
One of the most maligned, yet uniquely flavorful additions to Paper Mario: The Thousand-Year Door is the added presence of the battle arena. The occasional dropped props and stray sprays add that little bit of character to the stage, as well as a sometimes unwelcome extra element of unpredictability to the outcome of a fight. Unlike the audience, a surprising amount of whose mechanics can be calculated and planned for with a lot of game knowledge, any attacks with a chance of causing stage hazards can never have their effects predicted completely. That said, it’s always worth knowing exactly what you could be up against, so let’s do a deep dive on all the different types of stage hazards and their individual quirks!
Overview
Pretty much every attack performed in the battle (including using items) does a check to see whether any stage hazards should occur once it’s ended. The attack’s weapon parameters specify chances of each of the different types of hazards occurring; these vary between attacks, typically not exceeding 10% except for particularly destructive attacks such as Power Jump, Quake Hammer or Bob-ombast. Of note, nearly all enemy attacks don’t have any chance of causing stage hazards to occur.
The possible effects are as follows, and occur in this order:
- Background props falling
- Stage jets turning
- Stage jets firing
- Ceiling beam falling
- Offscreen props (“objects”) falling
Let’s dive into each of them individually…
Background Props
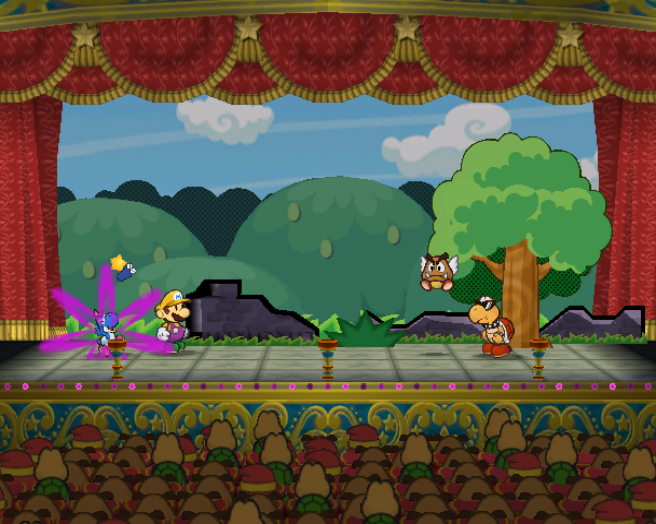
Every battle scene is outfitted with a varying number of stage props, meant to invoke the look of the area it takes place in. These backgrounds broadly form a few layers, named (from foreground to background) “A1”, “A2”, and “B”. The amount of props fitting each of these layers varies from scene to scene; relatively few actually have all three.


A sample battle scene from the Petal Meadows region, showing which props belong to which layers.
To determine which of these background props fall after an attack, there are two different random checks performed. First, a weighted random roll is performed to determine which of the A layers to destroy, if either. In practice, all attacks have a 100 weight for nothing to be destroyed, some weight < 100 that is used for each of A1 and A2 individually, and a weight of 0 for both to be destroyed at once.
For example, Power Jump has a 25 weight for A1 and A2 individually, and 100 weight for nothing to fall, meaning that 25/150 = 1/6 of the time, A1 is destroyed, and another 1/6 of the time A2 is destroyed. If the background layer this random roll determined should be destroyed doesn’t exist or already fell as the result of a previous attack, nothing happens instead (and the weights aren’t changed).
If the A1 layer doesn’t exist for a given scene or has already fallen down, a second random check is done to see if the B layer should be destroyed, this time just checking if a single random value from 0-99 is less than a given threshold. (Again, Power Jump has a value of 25 for the B layer, leading to a 25% chance of this occurring). If the A2 layer still exists at this point, it falls down with the B layer.
As for how this affects combat, background props are fairly tame, with the A1 and B layers of props both causing a single point of damage upon falling (which can be negated by guarding or Superguarding). This damage may only affect either the player or enemy side of the field, depending on the layout of the props (for the scene above, A1 will only damage enemies, but B will damage everyone). The A2 layer is purely cosmetic, in any case, and usually consists of props that are short and low to the ground.
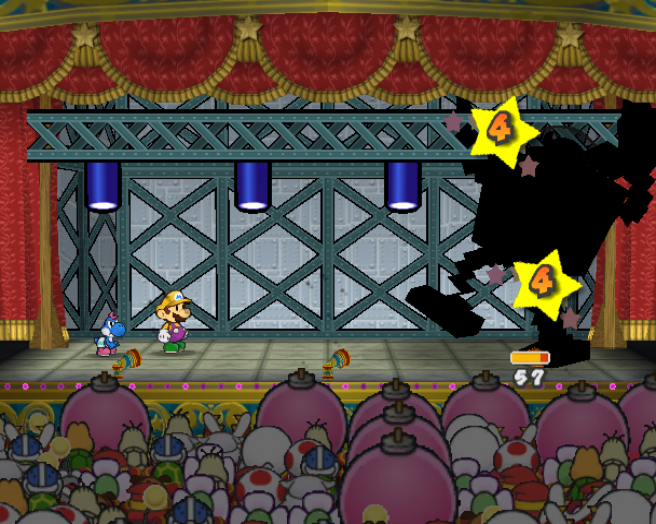
Ceiling Beam
Similarly to the background falling, the falling ceiling beam causes 1 damage to all actors, as well as grounding anything currently attached to the ceiling. This can be used to end Rawk Hawk’s ceiling phase prematurely (though all attacks available at that time have a very small chance of causing the ceiling to drop).
Notably, Spring Jump cannot be used successfully when the ceiling beam is present; Mario will slam into the ceiling before having a chance to reach his target. This has a whopping 50% chance of making the ceiling fall, though!
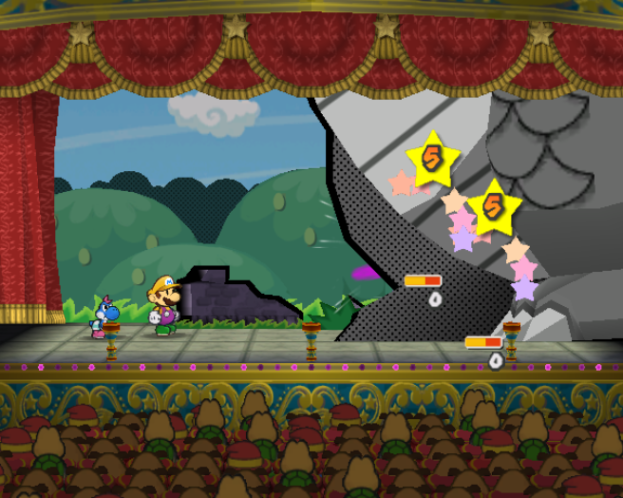
Stage Jets
The stage jets (“nozzles” internally) are added to the decor when Mario reaches B-List Star status (level 10), and are probably the most infamous stage hazard. Meant to evoke fog machines and flashy pyrotechnics on real-life concert stages, these function quite similarly, resulting in a fog that covers the stage, or if the jets are pointed towards the stage, a variety of damaging and/or status-inducing effects.
There are four types of stage jets: fog, ice, explosions and fire. These appear in varying proportion based on Mario’s current rank:
| Rank | Fog | Ice | Explosion | Fire |
| B-List Star (Lv. 10-19) | 65% | 35% | — | — |
| A-List Star (Lv. 20-29) | 35% | 25% | 40% | — |
| Superstar (Lv. 30+) | 20% | 20% | 25% | 35% |
The type of jet never changes within a single battle, and is determined either at the start of the battle (firing off before combat starts) in fights without a First Strike, or on the first attack in which they are randomly determined to fire otherwise.
After every attack, the jets do two independent random checks: one to toggle between all facing upward, and each facing the left or right side of the stage, and one to determine whether or not they should fire. For instance, performing a normal Hammer attack has a 6% to make the jets turn, and a 2% chance to make them fire.
If the jets are facing the stage when they fire, then attack parameters are constructed dynamically to determine who should be targeted and how strong the effects should be. This is done by taking a base set of parameters for each side with at least one jet facing it (which basically specifies nothing except for which targets to filter out; one for the player’s side that disallows enemies and system actors, and one for the enemies’ that disallows system actors, Mario / Shell Shield, and his partner), and mixing it with parameters for the individual jet types that determine the attack’s damage and damage function, its elemental type, and what statuses should be applied (with the damage and status turn count being multiplied by 1, 2, or 3 based on how many jets are facing that side) as follows:
| Jet Type | Damage Function | Base Damage | Element | Status |
| Fog | Fixed | 0 | Normal | None |
| Ice | Non-damaging | — | Ice | Freeze, 1 turn |
| Explosion | Fixed | 2 | Explosion | None |
| Fire | Fixed | 1 | Fire | Burn, 3 turns |
Interestingly, the ice jets are completely non-damaging, meaning that they are incapable of dealing damage, even to enemies weak to the Ice element. By contrast, the fog jets’ attack, which normally does nothing, can cause damage due to P-Up, D-Down.
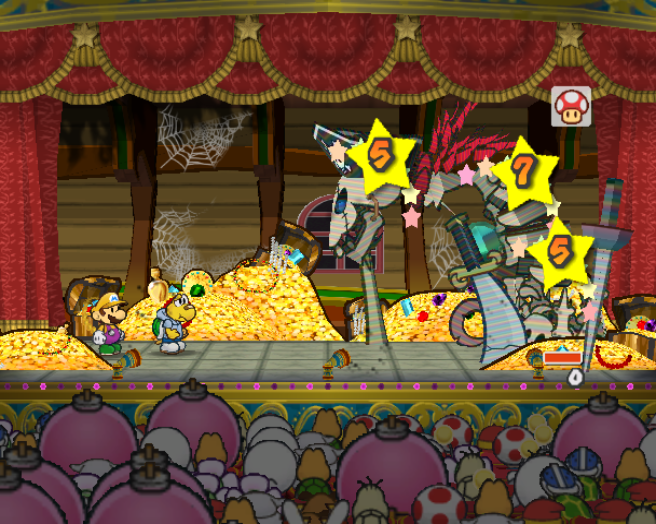
An especially odd quirk of stage jet attacks is that because of the way they are dynamically constructed and how barebones the base “player side” and “enemy side” attack parameters are, they do not include the “force target only high-priority parts” flag normally included on multi-target attacks. This means that any enemy that has multiple targetable parts tied to the same actor has all of them targeted simultaneously, usually resulting in multiple times the intended damage.
The affected parties include the dragons (head and foot), Grodus (both him and his staff; even though the staff doesn’t make Grodus take damage, both hits count towards the chance of his next attack failing), and both Magnus von Grapple bosses, who as mentioned in the previous article have separate hitboxes for their body and foot to make attacks land more naturally:
Worst of all, Cortez’s first two forms cause his head and and bone pile to both be hit at once, and after attacking his bone pile twice in the second phase, his head, bone pile, and the exposed gem in his chest (which takes an extra point of damage due to elemental weakness) can all take damage simultaneously for up to a whopping 17 damage at once!
Fog Jets
As their name suggests, fog jets’ main effect doesn’t come from their damage (or lack thereof, as the case usually is); their more notable effect is that when they fire, the stage becomes shrouded in fog for 2 turns, which causes most attacks to miss 50% of the time. Unlike the other types, this occurs regardless of whether they are facing the stage. (However, the “attack” part will only occur if they’re facing a side, unless that attack itself misses due to the fog!)
A few attacks, mostly the Special Moves, are able to skip the fog’s miss check, but generally you’re forced to wait the 2 turns out; however, there are a handful of actions that can dispel the fog prematurely:
- Bobbery Appealing
- Bobbery using Bomb (happens after the attack, so it can still miss)
- Bobbery’s Bomb Squad bombs exploding (happens before the attack)
- Bobbery’s Bob-ombast (happens before the attack)
- Bobbery’s Hold Fast being triggered
- Bob-ombs exploding (if attacking, the miss check happens before it hits)
- Bulky Bob-ombs or Bob-ulks exploding (happens before the attack)
- Flurrie’s Gale Force
- Using an Ice Storm item
Of these, Bomb, Bob-ombast and Gale Force all have a chance of bringing the fog back immediately afterward, but if your aim is to clear the fog without that chance, appealing with Bobbery and using Ice Storm can’t cause any stage effects, so go wild!
Falling Objects
The final and most varied group of hazards. Each attack does a single random roll to see if an offscreen prop should fall, and if that chance succeeds, picks one of the eligible prop types for Mario’s current rank with equal probability. Here are the nine types of falling objects in action:


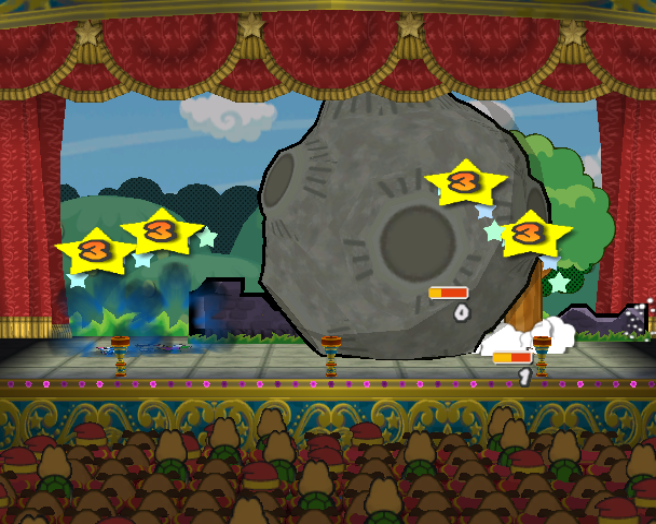

A deluge of decor and debris!
And here are their effects:
| Prop Type | Minimum rank | Damage | Status |
| Bucket | Rising Star | 1 | Dizzy (3 turns, 50%) |
| Stage light | Rising Star | 1 | Electric (3 turns, 25%) |
| Basin | B-List Star | 1 | Dizzy (3 turns, 50%) |
| Water | B-List Star | — | Multiple (clear, 100%)* |
| Small bug(s)** | A-List Star | — | Confuse (3 turns, 50%) |
| Large bug | A-List Star | 1 | Confuse (3 turns, 50%) |
| Fork | A-List Star | 2 | Sleep (0 turns, 100%)*** |
| Meteor | Superstar | 3 | Dizzy (3 turns, 50%) |
| Bowser statue | Superstar | 5 | Confuse (3 turns, 100%) |
* The water stage effect clears the following statuses: Sleep, Stop, Dizzy, Poison, Confuse, Electric, Burn, Freeze, Charge, and Payback. (Guarding it will stop all statuses from being cleared.)
** The small bugs come in two sub-varieties, either a single small bug or a swarm of them; they still only count as one type of object.
*** This effectively clears the Sleep status. Note that this does not guarantee it’s cleared if the target has < 100% Sleep vulnerability; if the vulnerability roll fails and the 50% chance of the target waking up from attack fails, the target might remain asleep.
The target of the falling objects is chosen like randomly targeted enemy attacks, choosing randomly from all non-system actors with a 10% bias to the leftmost character (i.e. whoever the player has in the back), except the meteor and Bowser statue, which always hit all characters, or all characters on a randomly chosen side, respectively. There is also a 10% chance of any of the single-target hazards to hit the audience instead, causing all the audience members in a small range around the impact point to leave.
Closing notes / miscellanea
This covers most of the important info on stage hazards, but a couple more notes:
- Mischief-causing Shy Guy audience members will trigger either a falling object or the stage jets to fire with equal probability (assuming Mario is B-List or higher; otherwise it will always be a falling object). The side of the screen the Shy Guy runs off to has no impact on who the falling objects target.
- Some types of stage hazards might be disabled during special occasions. Notably, falling objects are disallowed during the Crump prologue fight and all tutorial fights, and the ceiling from the Chapter 5 Crump fight is impossible to destroy (unlike the Rawk Hawk fight).
- There’s an unused byte after the usual stage hazard rate parameters that takes on similar values to the others, which suggests there might have been another type of stage hazard that was cut from the game earlier in development. Even as early as the July 2004 demo, there isn’t any code that seems to reference the parameter directly, so it’s only speculative what it could have done.
- The only enemy attacks that are able to cause stage hazards are the dragons’ stomp, which have a 10% chance of causing a falling object. If you feel like winning the lottery, try getting Hooktail’s stomp to self-inflict Electric status (which she has only a 10% susceptibility to)!
If you’re interested in looking at the rates for specific player attacks, you can find a spreadsheet of the hazard chances caused by player attacks in my stats Drive folder, or you can dump the attack parameters and event scripts for all attacks in the game using my ttyd-utils suite of scripts (look for calls to “btlevtcmd_WeaponAftereffect” in the event scripts to see which attacks actually use their parameters!)
Until next time, where I’ll cover the basics of enemy attack AI!
